 Technical Support
Tape Backup Replacement Process
The tape backup procedure is conducted on Monday or Tuesday mornings. Weekly tape backups are picked up and stored offsite on Wednesday mornings, usually between 10AM and noon.
Identifying which tape will be replaced.
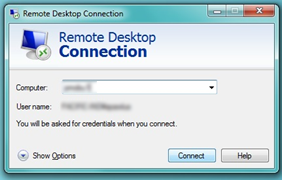
- Login to backup server via Remote Desktop Connection using your Windows login credentials.

- Double Click the Backup Exec 2010 icon on the desktop.

- Click on Devices in the toolbar. (Screenshot below)
- Click on the + sign next to HP 8 Tape Autoloader to expand the view. (Screenshot below)
- Click on Slots to view the tapes in use. (Screenshot below)

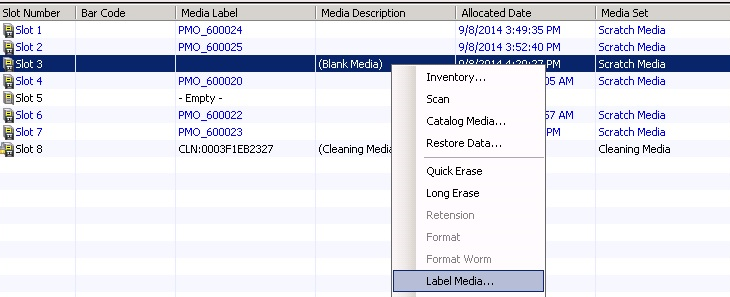
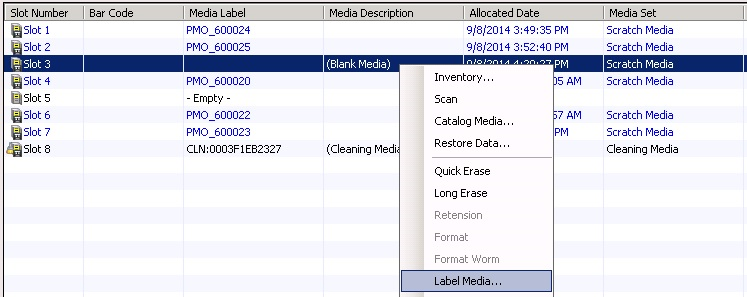
Slots 1-7 contain backup tapes. Tapes that have yet to be used (blank) will have purple text. Slot 8 will always have black text. The tape(s) that contain(s) backed up data and needs exchanging with a blank tape will be found in slots 1-7 and will have black writing. It will also usually have the lowest label number as indicated by the last two digits of the label in the media label column.
After you have identified which tape to replace, make a note of which slot the tape is located in. You will now physically replace the tape.
Physically replace the tape.
- Open the HP server rack metal door.
- Located the HP Tape Autoloader. It is about 6 feet up from the ground and mounted in slot 38.
- Click on the left arrow button on the tape autoloader a few times until Operations is displayed.
- Press Enter to select Operations. (Unlock Left Magazine will be displayed by default. Clicking Next will display Unlock Right Magazine.)
- Select Unlock Left Magazine or Unlock Right Magazine and Click Enter. The left magazine contains tapes 1-4. The right magazine contains tapes 5-8.
- Enter the password, all 1s.
- Remove the appropriate tape tray from the autoloader.
- Press the tape from the back to remove it from the tray. The front of the tape will have the label on it.
- Label the new tape. Write BU1 on it as well as the sequence number. The sequence number will use a labeling convention of pmo_6000##. ## is determined by adding one to the highest media label number used under Devices in Backup Exec. (New tapes are located in the top drawer of the file cabinet that is located across from the HP Server Rack and 2 feet to the left.)
- Insert the new tape into the empty slot and place the cartridge back into the tape autoloader.
- Close the HP Server Rack Metal Door.
- Write todays date on used tape and place it in the metal box on the front right desk.
- Fill out the next line on the backup tape log. Prepared date is today’s date. Container number is the number on the metal box that will be removed for offsite storage. Media is the label on the tape. Back up date will be the Sunday before the tape was replaced. Store location is CSS. Validate Initial will be initialed by IT personal other than the preparer, who has confirmed the tape has been replaced.
Physically replacing the tape has been completed. Return to your PC to complete the remaining steps.
- Return to the Backup Exec program and click on Devices.
- Right Click on Slots under HP 8 Tape Autoloader.
- Click on Inventory and then Run Now. The inventory process will take about 10 minutes, a window will pop up when the process completes, press Okay.

- Right Click on the slot with the blank media and select Label Media.

- Type in pmo_6000##, replacing ## with the number that was physically written on the tape.

- Click OK. A window will pop up when the labeling process is completed. Click OK again.
- Close the Backup Exec software.
- Log out of Backup Server.
On Wednesday morning, our offsite storage solution company will stop by to collect the weekly backup tape box. They will drop off a new metal box that contains a backup tape that has been stored offsite for 3 months. They will also provide two receipts, one to sign for them and our copy. Place our copy in the back of the backup log book. Remove the old tape from the metal box and place in the storage bin on the floor right next to the backup log book.